Showing posts with label Alps Mountaineering Lynx 2. Show all posts

2019-07-18

The Chaos 3 Backpacking Tent by Alps Mountaineering

The day finally arrived when I found a girl that wanted to share in my misadventures! The trouble is, my seven year old Lynx 2 just isn't large enough for two people AND their jackets, helmets and boots... So I opened the wallet, blew out some of the dust, and placed an order for the Chaos 3 tent by Alps Mountaineering.

The Alps Mountaineering Chaos 3


 After paying for the floor saver, taxes and shipping charges, I think I am into this tent for $300 Canadian. You can do much better than the manufacturers suggested retail price of $279 USD, so shop around.
Pictured with rain fly


Chaos 3 by Alps Mountaineering
Why the Chaos model? It has more interior mesh than the Lynx 2 so it should offer more ventilation for hot summer weather. The cross bar supports the sides, so in addition to more available headroom than the dome, it also keeps water from dropping down INTO the tent which imho was the Lynx 2s single biggest failing. During a rain shower in the Lynx 2 you had to keep the rain fly zipped 1/2 way to channel the water down away from the inner tent. It's a dome shape, think about it.

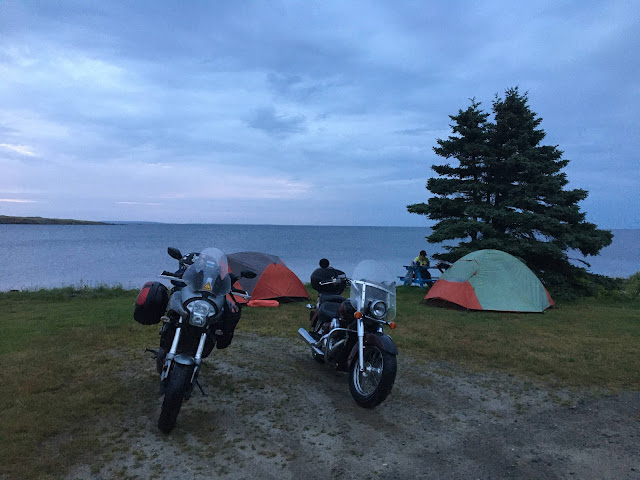
The Lynx 2 set up at Soldier's Bay Nova Scotia
It's a couple of pounds heavier, but basically the same pack size and should give us enough room to store our helmets, jackets and boots inside the nice dry tent with us.

Optional Accessories:

You may find as I did, that the Alps tents can benefit from items such as a footprint, some better engineered tent pegs, etc. I did this with my Lynx 2 and have already bought a new footprint and a set of decent tent pegs. I've plenty of 550 paracord to make my own guy ropes if there are any needed for the Chaos 3. (It needed them)

  • Footprint
  • Tent Pegs
  • Guy ropes


I purchased the tent from Motorsport.com a week and a half ago, and the floorsaver from Amazon.ca and they just arrived at work today, so now I have dreams of pitching a tent on the Company lawn after work! Yeah, I can get a bit weird like that. :D

Unboxing and first pitch:

The stuff sack they pack it in has a couple of friction buckle straps on it with a carry handle, and when I slackened them off to get the tent out, found they were stitched onto the bag, and I found myself silently applauding their design change.

Next I found that the tent poles, do to their single pole design, were a bit bulky, and that was proven again when they went back into the bag from whence they came. I thought of myself standing in a downpour with water dripping off of my nose as I tried to slide the poles back into the bag. 

Setup is very straightforward. Lay out the floor saver, lay the tent on top of that, set up the poles, then place the foot of the four poles into the grommet in each of the four corners of the tent and floor saver, then clip the hooks onto the poles and Voila! The tent is up and you just need to sort out the rain fly. 

The Alps Mountaineering Chaos 3
Shown with the spreader pole installed, this is the magic of this tent... My old Lynx 2 would allow rain to drop straight down onto the tent floor if the fly was not zipped up to within 12 to 18 inches of the ground, while this tent uses the spreader to allow you to have the rain fly doors rolled up and out of the way if the rain is not driven sideways.

Setting up on the lawn outside my apartment building
Unboxing the tent, the rain fly does not have the guy ropes attached, so I quickly fastened them on using a secure bowline for each one, but as I noticed with my older Lynx 2, Alps Mountaineering still leaves two guy rope attachment points on either end of the tent, but with no guy ropes for it. I was prepared and quickly fashioned a couple of three foot guy ropes out of some spare para cord that I had brought down for just that purpose. 


The pale guy rope in the centre is one of two I just added. When the tent is guyed out, you want to stake these two ropes out so the rain fly stands off of the interior tent. And speaking of guy ropes, they added a strange tensioner that seems overly complicated. It's a black piece of plastic with a friction portion that just isn't intuitive.

This is it, and I find it overly complicated - Guy rope tensioner

I bought a lot of ten of these guy rope tensioners for $3
So today I shelled out a whopping three dollars and will replace the supplied guy rope tensioners with some primitive stone aged ones that have been working since man learned how to make rope. I sourced them on AliExpress and with free shipping should arrive in time to make a November birthday present to myself. Seriously, my girlfriend, while we set this up in the rain (speed was critical) wrapped the guy rope around the pegs as she did not have the time to sort out how they worked, and why would you? The Alps Lynx 2 used the tried and true two hole plastic tensioner.


One of the elements I loved about the Lynx was all the guy ropes were on the four corners of the tent, with none in front of the doors themselves, but not so with the Chaos 3, so I'll ask everyone to kindly watch their step when entering and exiting the tent.

I miss the "window" that the Lynx 2 boasted, but I think my girlfriend wouldn't have been so happy with a window in the Chaos... I still can't figure out why not though. I like them on a rainy morning or in the evening when you hear something stirring close by.


The included gear loft needed to be hung up, and I had to have a do over, as it is a diamond pattern instead of square, and I hooked it up incorrectly the first time.


Disassembly and Put away:

It went down fast, and when I say fast, I mean in under ten minutes I had my brand new tent rolled up and back in the stuff sack ready to roll.


  • Remove the ten tent pegs used to secure the tent and fly
  • Place the tent pegs into the stuff sack
  • Remove the four rain fly buckles
  • Remove the rain fly, and from the top, fold the wings in half and half again until you have a long narrow sausage of a rain fly.
  • Remove the clips from the spreader pole
  • Remove the spreader pole and set aside
  • Remove the clips from the main pole structure
  • Remove the poles from each of the four corners of the tent. 
  • (Reinsert the "ferrule" portion of the poles)
  • Collapse the poles
  • Place the poles in the stuff sack


These "ferrules" may pop out on you. I was three for six today.

  • Fold the tent lengthwise in thirds
  • Place the rain fly on top of the tent
  • Place the poles (already in stuff sack) on top. 
  • Roll the tent using the poles to keep it taut and tight, pulling towards you, keeping the guy ropes off the fly inside the roll. 
  • Knead the air out of the tent roll, and place into the stuff sack. 
  • fold the floor saver and return it to it's stuff sack
  • Close the tent stuff sack after inserting the floor saver and tent pegs. 

Getting ready to put it away. 
If the fly is wet, or the floor saver, you can cocoon the inner tent inside the floorsaver (in thirds) placing the wet fly on the wet floor saver. At your campsite later that night, you may still have a nice dry interior tent. It works well for me. 

Pros:

  • It goes together fast. You can have this up and standing in the rain less than five minutes if you forget about the tent pegs for a minute or two. 
  • Lots of mesh, and with the spreader bar, you can ventilate the tent in a light rain shower. 
  • Roomy for two people, with extra room for motorcycle gear. Alps reliability. Well made for a decent price.  
  • Freestanding. Erect it, then decide where it needs to go on your campsite. 
  • The rain fly buckles on and off.
  • Fantastic quality and durability that I've come to expect from Alps Mountaineering

Cons:

  • The tent is not a backpacking tent and is quite heavy, but if you were hauling this up a mountain and spread the load between those three people, I'll take those words back and hope you will all be comfortable. 
  • The "ferrules" pop out of the poles when disassembling the tent, and are a minor annoyance to deal with. 
  • There are two guy points that will need user supplied guy ropes and pegs.
  • Supplied pegs are waiting to hit a rock and become pretzels, and won't do well in a sandy soil. 
  • The tent stuff sack is on the small side, and you will have difficulty getting a wet tent back into it. A dry tent can be a struggle to get into it. 
  • The complete tent and floor saver have some weight to them.
  • Two doors, but with two guy ropes needed right in front of those doors.
  • The guy rope tensioners are a new fangled over-engineered and poorly thought out complication.  
  • It can take two hands or a hand and a foot to unzip the screen doors, which is not ideal if your hands are full.   
Would I recommend this tent? Absolutely, but as I did with my Lynx 2, I give it four out of five stars.

Cheers!

Update: 2019-07-29

I've only spent two nights in the tent so far, so hope to have more for you later on this summer. It goes up easily and performs as intended in hot weather, and seems better ventilated than my Lynx 2 which is what I was hoping for with this design, two days and nights with only a touch of rain, and highs of 30 degrees Celsius in Fahrenheit that is HOT! Damn hot!

Update: 2019-08-05

Caroline and I did a ride around the Gaspe peninsula on the long weekend, and we ended up inside this tent during a heavy downpour, a couple of nights in fact, and even with the rain fly vestibule open, water didn't get into the tent.

It beads then a larger bead runs off the tent and down. 
I'm so much more used to the dome tent of the Lynx 2, but this one works even better at keeping me dry, as I can finally leave the rain fly rolled up with out water dripping down onto the floor of the tent.


When the initial heavy downpour had subsided, I took a short video of how the rain fly works, and I admit to liking the pale colour as it lets quite a bit of light into the tent, and it becomes easy to see if it is day or night.


La Zec de la rivière Nouvelle, Qeubec

Update: 2019-11-13 

Camping season is over for us, but I did want to tell you that Caroline and I brought this with us for a two week tour from the East Coast to Ontario and back. It preformed well, and we sorted out the space issues nicely between the two of us. I began stuffing some of my clothes into the waterproof canoe bag that was left outside which freed up some room, and later on in Grand-Metis Quebec when it dropped down to below 5 degrees Celsius (approx 40 Fahrenheit), it performed well, but clearly is a three season tent, although it doesn't build up as much moisture on the interior as does my Lynx 2 in similar temperatures. My biggest pet peeve after all that use this season? Those darned "pop-out" ferrules at the bottoms of the tent poles, that pop out when you pull the tent pole out of the grommet from the tent itself. *Grrrrr!*

Ferrules that pop out.

2012-10-20

Rotten gets a new tent - Alps Lynx 2

I've been using my Bass-Pro three man special since the summer of 2006 when I bought it to attend the Parry Sound Sport Bike Rally where a bunch of friends and I camped out for a couple of days to enjoy the festivities surrounding the event (get drunk and toast marshmallows while watching people do wheelies past the campground).

Alps Mountaineering Lynx 2

The new... and now, some background information about the old tent and what I wanted to replace it with. 


Bass Pro Special


Admittedly, I know little about tents, as much of my time spent in the army was in canvas and aluminium modular tents, and under shelter halves. Each soldier carried one half of the shelter, and zipped together and suspended from the trees made a water-proof cover provided you didn't pitch it over top a bathtub shaped hole in the ground. I like to think of it as a kitchen cover for the mosquitoes, who could feast on those within to their fill, inviting neighbours and friends to come join in on the feast. My Bass Pro 3 man was lighter than anything I'd used in the past, and had much more mesh than I was used to, and as a 3 man tent, it boasted more than enough room for me and all my bike gear. I had it sent up in the purse, but lugged it all back home on board my bike. In those days I was packing the kitchen sink. And the kitchen.

The kitchen.

On last year's trip across the Trans Labrador Highway and Newfoundland, that old tent saw some heavy use, the first of which saw us pitch camp on a construction site lot in the middle of a Quebec forest along the North Shore enroute to Baie Comeau and Manic Cinq.

My two riding partners, Chris and Darlene had opted for lighter, newer 1 man tents, and while they had pitched them before, my experience and the simple cross pole dome style tent had mine up in no time allowing me to snap a couple of shots of the action.

They have the double hoop design that relies on the hoops being guyed to support the mid section of the tent,  and I found that in the dark, and on rocky ground, the free-standing dome, while large and heavier, was the better choice.


Again, in the morning, I had mine packed up and ready to roll before they had their gear sorted out, but then I also had the largest panniers and perhaps had a wee bit more road experience in terms of packing.

As I recall, Darlene wasn't at all happy with how she'd loaded her gear in her Wolfman soft panniers, and repacked them that morning while waiting for breakfast.


Crossing the Saguenay river with loaded bikes.

Later that night at Manic Cinq, we found that a thunderstorm was rolling in, and as the motel was full up, we were invited to pitch our tents on the graveled parking lot, although our friends Geoff & Viv kindly let us wait out the worst of the deluge from the comfort of their motel room, later on during a quiet moment, we dashed out and began to set up our tents on the gravel surface. Once again mine was up fast and first, the free standing dome clearly superior to the stake out type, although mine probably bulked 2/3 more than theirs.

The parking lot at Manic Cinq
 During the night we had yet more rain, and the hoop and guy system sagged in as related by Chris, and had to be retensioned to improve the drainage. My chief complaint was the snoring going on beside me. ;)

It's a heavy load on the bike, but the trip was well worth it.


Churchill Falls, Labrador
 The town of Churchill Falls, Labrador boasts a damn tour, or rather a tour of the hydro-electric dam, and visitors with tents are encouraged to pitch them on the field in behind the communities sole church.


But the weight of that tent, along with the other gear that I'd packed for this adventure, was partly to blame for losing control of my bike and planting it in the only ditch I could find in Northern Quebec. I'd dropped a gear, tipped the bike in, rolled back on the throttle and really enjoyed the feeling of the rear end power steering it's way around the gravel corner, that is, until I hit washboard with the front end, and it began to oscillate wildly from side to side eventually ending in a tank slapper at full lock and I was off the bike sliding in the gravel as we both rushed towards the only man made ditch on the seemingly the entire stretch of road.

Everything could be repaired but my injured pride.
Okay, this bike was now so heavy, that riding it adventure style was just not in the cards, although the wheelies were quite impressive.

Kickstand puck anyone?
Yep, even mother earth was complaining, but never in my prescence, always when I'd turn my back and go for those beautiful shots of Gros Morne Coastline.

Enter a new bike, lighter, smaller, faster than the venerable old 2004 Kawasaki KLR that now had over 88,000 kilometers on it. I traded up to a 2009 Suzuki DR650E, but gone were my racks and ammo can panniers, gone was the spacious corbin flat seat that saw me ride 1,600 kilometres in a single ride.

2009 Suzuki DR650E

Here it is loaded up for the Canadian Superbike doubleheader championship races that my friends are I camp out at every year along Turn 2 inside track.

The tent isn't on the bike at all. I was getting worried, as I had cold weather gear loaded, my sleeping bag all in the lower canoe bag, then my self-inflating air mattress in the dry bag above, rain gear strapped ontop of that, and many more odds and sods in the top box like toiletries, heated vest, flip flops, spare visor and the like. It was getting crowded on here, and when my buddy Dan offered to loan me his old North Face tent that he'd had since a boy in New Brunswick which he'd replaced with a North Face Rock 22, I didn't turn down his gracious offer, and spent the three days in his tent as opposed to hauling my own. I was pretty depressed, as I loved the handling and dirt characteristics of this lighter bike, but clearly I was going to have to learn how to pack lighter still, yet still be able to handle inclement weather, as from past experience I have been shivering with cold on August and July nights. I had to find a solution that was both inexpensive, yet would be a good investment for the future.

It would have to be:

  • Lightweight and in the backpacking class, while not ultralight
  • Roomy, for I'm 6 foot, and a big guy with lots of gear
  • Have a vestibule for boots and things that I wanted to keep out of the rain
  • Freestanding - this is a must with no compromise.
  • Aluminium poles for strength and weight, preferably straight without fancy hubs and things so the erection, repair or replacement is straightforward
  • Clip type hooks to fasten to the poles as opposed to sleeve type
  • A gear loft - I fell in love with my gear loft and having a tube of after bite and a flashlight up there
  • A strong, water proof, bathtub style floor. I prefer the Outfitter style that has the heavy tarp style floor, but couldn't source one in my price range.
  • Buckle on tent fly - you try setting up a tent in a windstorm in heavy rain on a rocky surface. This feature lets you erect the thing, buckle on the fly, and load it with gear while waiting out the rain to see to the guyying out the fly later on.
  • 1/2 to 3/4 mesh as most of my camping is done in warm to hot weather unless of course you count Newfoundland.
What I came up with was a few like the REI Quarterdome, the MEC Camper 2, North Face Rock 22, among others. A name that kept coming up was Alps Mountaineering that gives boy scouts a great discount when purchasing their gear.

There were reviews and videos aplenty, and I found myself considering other styles of tent such as the Chaos 2 and the Vertex 2, even their Extreme 2 as it was a four season tent, but those two seperate easy to sort out poles kept coming back to my mind, and I thought the Chaos had too much mesh, while the Vertex looks like it was a bit too close for a hot, humid summer night. 

So in the fall of 2012 I finally decided I'd go with the Alps Mountaineering Lynx 2, and placed an order through Amazon.ca for one which arrived at the local post office on Friday and was pitched on my sister's lawn that very same night as I knew that there was no rain in the forecast, and that if I was able to pitch it for the very first time in the twilight before sunset, and take it down in the dark that followed armed only with my Petzl Headlamp, it would be a good test for actual use later on.

Even my nephews commented on quickly I had the tent set up on the finished lawn, but I also found that I had a few questions regarding where the tent was supposed to pegged, and two spots on the fly that looked like they need a wee guy line to properly tension the rain fly away from the body of the tent, and I found that while shipped ten light duty aluminium pegs, I'd need two more with a six to eight inch loop of cord attached to the rain fly to guy out the two ends.

The floor is the same material as the walls, and as I'm used to the rugged tarp style floor of my older tent, was a bit nervous about standing on the floor of it without a floor saver, even on a finished lawn, so in my mind a floor saver is a must, especially as my dog loves camping and is no stranger to motorcycle rides.

I'd heard of people taking down the tent from the inside while leaving up the fly, as if in a massive downpour of rain, so that was how I did it that night, and it came down easily and qucikly, although I did have problems deciding how to fold and store the tent, and I'll have to repack it again to get it to it's proper bulk in the included tent bag.

It's almost exactly what I was looking for, roomy enough to me not to feel claustrophobic, yet small enough not to blot out the scenery. :D

Strangely, it bulks almost as large as my older tent, but is 1/2 the weight or better than the old one which I'll let my nephews use when moto camping next year with them. After I treat the rain fly for that wee pesky leak  that developed on my last night on Newfoundland.


Mine is in a Sage and Rust colour, but the tent pictured here is identical.

I've ordered some tent pegs off of eBay in an aluminium triangular design similar in appearance to the MSR Groundhog style as the included pegs are the type that need to be straightened after they hit the first good rock or three, but at half the price, in the amount of 20 of them. I also found the ALPS footprint for the tent and have that on it's way as well, but may resort to Tyvek or the Canadian Tire Blue tarp that we all know and love.


Under $10 on eBay.ca
The Alps footprint has some lovely grommets on it for use as a dining fly etc. 


Well, I managed six years before opening up a hole in the bathtub floor of my old tent, so when my nephews erect it for the first time they'll find a nice patch of duct tape on the floor to keep the ants and water out. Hopefully I'll fair a bit better with the new tent, but if not, I have this kit to see to any field repairs.

And of course, a tent repair kit for those mornings when you wake up hungover.


Does anyone know where I can get a couple of cheap aluminum poles that I could use to support a dining and cooking fly?

I'll be sure to post up and update later on once I test drive this puppy and find out how it performs or fails to.

Cheers!


2014-08-16 Update

The tent saw me from Ontario to Prince Edward Island and around the Gaspe, through Quebec, home again and out to the Canadian Super Bike double header championship weekend at Mosport, and in that time it's seen days of showers, and stayed bone dry inside except for what water I skilled or tracked inside with me. I have enough room for my sleeping bag and mattress and my riding gear inside. 

What can I say? It feels a bit chilly in 6 degree Celsius weather, but once the doors are zipped up, it retains heat well and warms up by morning with body heat. 

Gear placed in the vestibules stays dry with the exception of ground water. 

It goes up fast! In a downpour in Drummondville Quebec I had it up and staked out in under five minutes. I packed it away wet that morning, then two days later put it up wet at the racetrack and it dried out nicely in a few hours. The following day it shrugged off a five hour (going on six) rainstorm perfectly. 

What don't I like about it?
It packs up larger and heavier than I like for Moto camping.
The two vents in the rain fly work, but water collects a bit in the sag. (This was after significant rainfall)
The rain fly has two vents near the top, and when open, water can pool there for a awhile.

 When the rain fly is zipped open, it allows rain to drop directly onto the tent floor. This is the single worst feature about this tent, and if they were to do a redesign incorporating a cross bar to prevent the water dropping straight down onto the tent floor when the rain fly is open, I'd happily purchase this tent again. Imagine a muggy, rainy day when you cannot open the side of your tent higher than a foot and a half for ventilation. Argh! (See the design of the Northface Rock22 to compare)

The pegs shipped with it are sub quality and prone to bend when you hit the first rock. It's missing two pegs and guy lines for the extreme ends of the fly, but there are two sewn on loops there. Six feet of para cord and a couple more pegs sort that out nicely, although it should have been included from the manufacturer.

The eBay pegs are great, although I broke the head off of one when I hit a rock and kept pounding. Lol. The stock peg would have become a pretzel. 

Of the group I'm camping with this weekend, it's the smallest tent, and there is only one better, and that one is far too large to fit on bike. 

I'll post more pictures once I get home. 

Oh, I met a guy with an MSR Hubba Hubba that was absolutely disgusted that the rain fly made contact with the tent mesh and let water in as a result. He rode and camped from South America to Alaska and was going to throw it away when he shipped his bike back to Switzerland. 

Overall, price and performance give it four out of five stars. 

I'd buy from Alps Mountaineering again. 

The short guy line on the rain fly is the one I added and provided a peg for.

Setup in Nouvelle QC along the Gaspe Peninsula

Suzi calls it her home away from home

After riding three hours in the rain, it went up in under five minutes in the rain and provided waterproof shelter in the constant rain that night. 

I spent the night in it at the 2014 Vintage Festival at Mosport, and it rained yet again, and had the opportunity to compare my tent to the North Face Rock 22 that my buddy Dan bought on a recommendation from his Mt. Everest climbing brother-in-law. The Rock 22 is 3/4 mesh to my 1/2 mesh, but has a much smaller aperture resembling textile to screen. The fly has grommets that clips on to the ends of the aluminum poles, and best of all, incorporates a single short pole that goes on over top the two domed poles to extend the fly's  vestibules out enough so that rain, even with the fly open will be shed and not gain ingress into the tent, something I've mentioned does happen with the Alps Lynx 2,as the fly opens to well over the open tent, and in a downpour water ends up sprinkling a portion of your sleeping bag and flooring. Not much, but enough to be cognisant of it.

North Face Rock 22
The tent pegs shipped with his tent are very similar in quality to the Alps pegs. 

The North Face Rock 22 also packs smaller an lighter, at a cost of about $225.

I think the Alps Lynx 2 performs very similarly, and I am happy with the purchase after having spent seven nights at six different camping spots in weather ranging from hot summer evenings to cold downpours at 6 degrees overnight temperatures. 

I'm still going to give it four out of five stars for design, price, and performance.

Update: 2019-06-21

The day has finally come to replace the Lynx 2 in favour of the Alps Mountaineering Chaos 3, simply because I have this awesome girlfriend CLine who wants to share my misadventures this season, and while the Lynx 2 was the perfect size for me and my gear, it's a bit wee for two plus their gear. The Chaos 3 has enough real estate to let us store our helmets, jackets and boots in the tent with us, which might be important, as who wants a skunk licking the salt out of your helmet liner at three in the morning? Nothing is happening with the Lynx 2, although if I head out solo again, it will come out of the closet. 

The Chaos 3 by Alps Mountaineering 

Update: 2022-03-11

Caroline has been using my Lynx 2 as her tent, to avoid my snoring in the Chaos 3. One of the poles got damaged, but I was able to shorten it a couple of inches and it worked perfectly last season for Caroline. This will be the tenth camping season for the Lynx 2 tent, and still completely waterproof. 

Overlooking Fox Island
Canso Nova Scotia